(Published in Blue Skies Magazine)
If the "small things" in life grab you, then you'll be taken by the Seven. This French-made rig is the brainchild of Basik Air Concept's Jérôme Bunker.
Basik's Seven container has a minefield of surprises for skydivers and riggers alike. I assembled, inspected and packed my first Seven container last month, and was impressed by the attention to detail and the several of the design features.
As a rigger, my first “Aha!” was with the full protection pocket for the AAD cutter at the base of the reserve container. In essence this keeps the entire cutter enclosed, allowing just the hole open to feed the closing loop through. It’s a clear concept change from the usual elastic keeper in most rigs to hold the base of the cutter in place, but leaving the rest of the cutter and some of the cable exposed as a possible snag point for reserve lines. Continue reading →
Several years ago, Dolphin container designer, Mike Furry, updated the most affordable sport skydiving container on the market making the newest Altico Dolphin rigs even more freefly friendly.
Older Dolphin containers were definitely made with affordable in mind. Dolphin containers have long been a solid choice for student operations, belly fliers and new skydivers looking for a well-designed new rig at a used gear price. But as freefly positions have become a mainstay of the skydiving industry, Mike Furry has had to update and modify the Dolphin container to keep those higher skydiving speeds in mind. Continue reading →
Elastic keepers come in two sizes: 1" and 1 22/32". The 1" is used on Type 17 webbing. 1 22/32" elastic keepers are used on Type 7 and Type 8 webbing. Elastic keepers are made out of a 1" elastic, trimmed out with Type III tape, double-needle seam and a zig-zag stitch.
Inspect the full main closing loop. Take the loop out of the main closing loop retainer and grommet. Inspect where the washer rests for any damage. Inspect where the loop passes through the grommet for any damage. Inspect the loop itself. Feel the grommet and washer for sharp edges.
Make a new loop to the desired length with two overhand knots to secure behind the washer. Replace the loop back into the grommet and into the main closing loop retainer. Check that the main closing loop retainer is in good condition and secure. Do a final inspection on the exposed main closing loop. Close the container and go jump! Continue reading →
The Mirage data label is located inside the pocket behind the right mud flap. Pull the label out with the red tab. The label will have the DOM, size, SN, TSO and similar info.
The packing data card is located in the same pocket or in a pocket on the backside of the label. The packing data card has all the container, reserve and AAD info.
The Mirage Main Pilot Chute is installed by inserting the kill-line, retention strap and bridle from the outside of the D-bag into the inside of the D-bag through the center grommet. Secure the two loops of the bridle inside the D-bag with a metal link or soft link.
All manufacturer's skydiving rigs are slightly different, so check this video and description out on how to give a pin check and put all the flaps back in place for your buddy's Mirage container.
The reserve pin cover flap can be lifted up to check the reserve pin, reserve closing loop and seal. To reclose the flap, tuck the side flaps first than tuck the bottom of the flap down. Make sure the flaps are fully seated and the flap is flat.
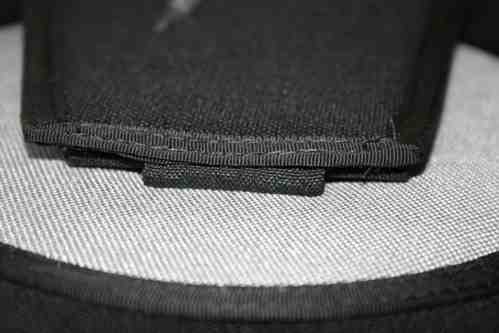
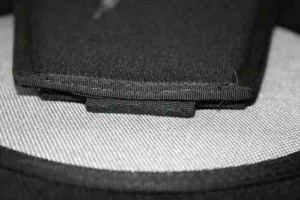
The Data Label for the Seven rig by Basik is located in the reserve pin cover flap. Lift up the reserve pin cover flap, which has tuck flaps on the sides and is tucked down at the bottom.
Reach into the pocket behind the pin cover flap stiffener and pull out the label. The DOM, size, SN, TSO and similar info is located on the label. Also inside the pocket will be the packing data card with all the container, reserve and AAD info. It will also have the record of the rigging done to the equipment. Continue reading →
All manufacturer's skydiving rigs are slightly different, so check this video and description out on how to give a pin check and put all the flaps back in place for your buddy's Seven container.
The reserve pin is checked by opening the reserve pin cover flap. Lift up the reserve pin cover flap, which has tuck flaps on the sides and is tucked down at the bottom. The pin, loop and seal can be checked. To close, tuck the tops of the side tuck flaps first, continue tucking the side flaps and then tuck in the bottom section into the pocket. Continue reading →
An Instructor at Skydive The Farm recently installed the Gath Altimeter Bracket to his Retractable Visor Gath, and found the process a bit tedious. He also discovered the bracket is not a "practical" mount for someone who wants to move an audible frequently from a couple of different helmets as it involves unscrewing part of the mount for removing the audible.
So he tried installing the audible on the inside of the helmet by removing part of the Gath padding and securing the audible with Velcro. Continue reading →
 Older Dolphin containers were definitely made with affordable in mind. Dolphin containers have long been a solid choice for student operations, belly fliers and new skydivers looking for a well-designed new rig at a used gear price. But as freefly positions have become a mainstay of the skydiving industry, Mike Furry has had to update and modify the Dolphin container to keep those higher skydiving speeds in mind. Continue reading